Inserting an Image
Images can be added to ulearn content areas, discussion board forums, journals, blogs, etc. Adding a short description to your image makes it accessible and able to be read by a screen reader.
Video Userguide
Video not loading? Watch on Youtube.
Instructions
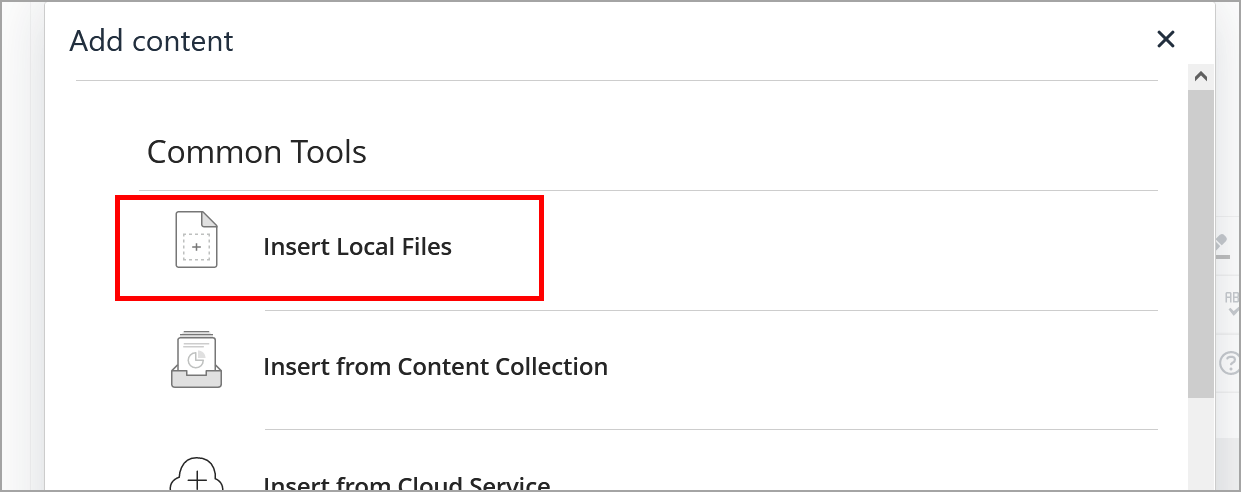
- Within a text box, select the Add content (plus sign) at the far right of the bottom row.

- Click Insert Local Files.
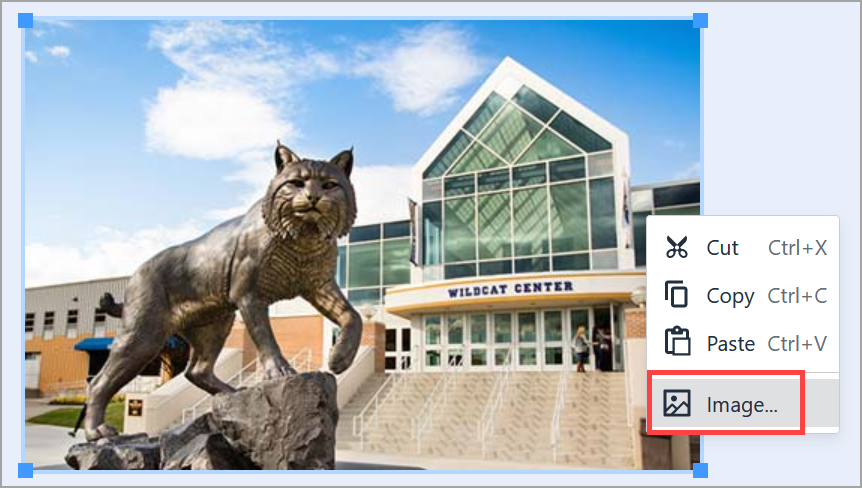
- Find and select the image you want to upload.
- Right click the image and select Image.
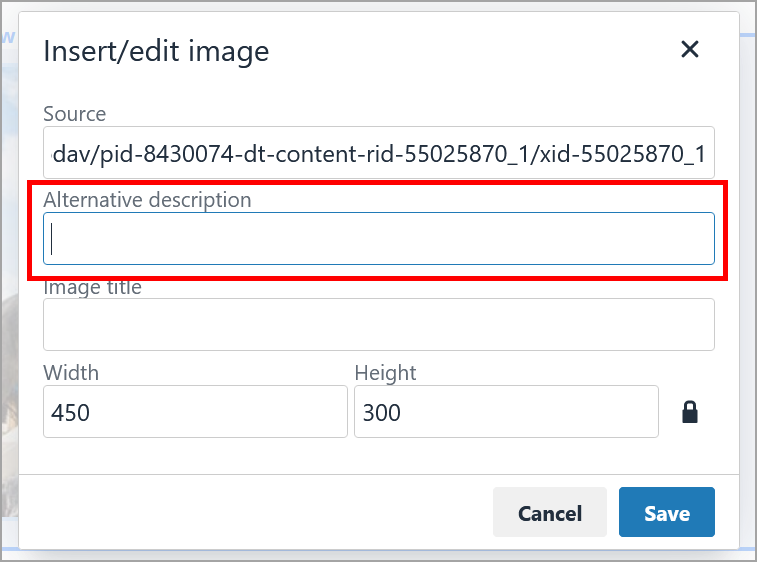
- Add a description, or alt text, to your image in the Alternative description text box.
- If your image has large dimensions, you should resize it so it will take up less space in ulearn. If an image is overly large, students may not scroll down to see what is below it. In the boxes underneath alternative description are numbers representing the image's width and height. You can adjust these values as needed. When the padlock is closed, you only need to fill in one box and the other box automatically updates. If you wish to manually adjust the width and height, unlock the padlock.
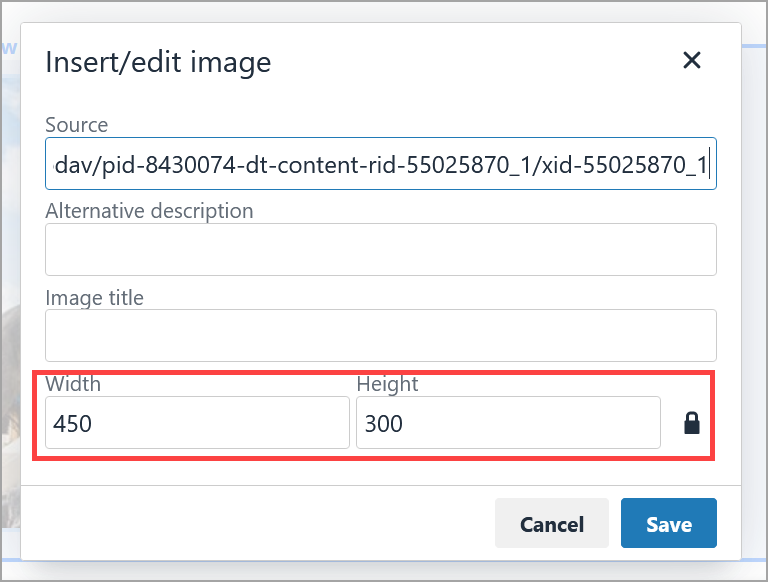
Note: 300px is the recommended height for profile images - Alternative Method: Left click directly on an image. A blue border appears. Click and drag one of the four blue boxes until the image reaches the desired size.
- Click Save when finished.